

This article will run you through 8 easy steps to convert an Aqara Door and Window Sensor to a Zigbee Wall Switch that can be easily integrated to for example Home Assistant.

1. You will only need the bigger of the two blocks inside the packaging.
The smaller block is actually only a magnet.
2. Carefully open the cover of the bigger block.
The cover is not glued and is meant to be opened to replace the battery when necessary.

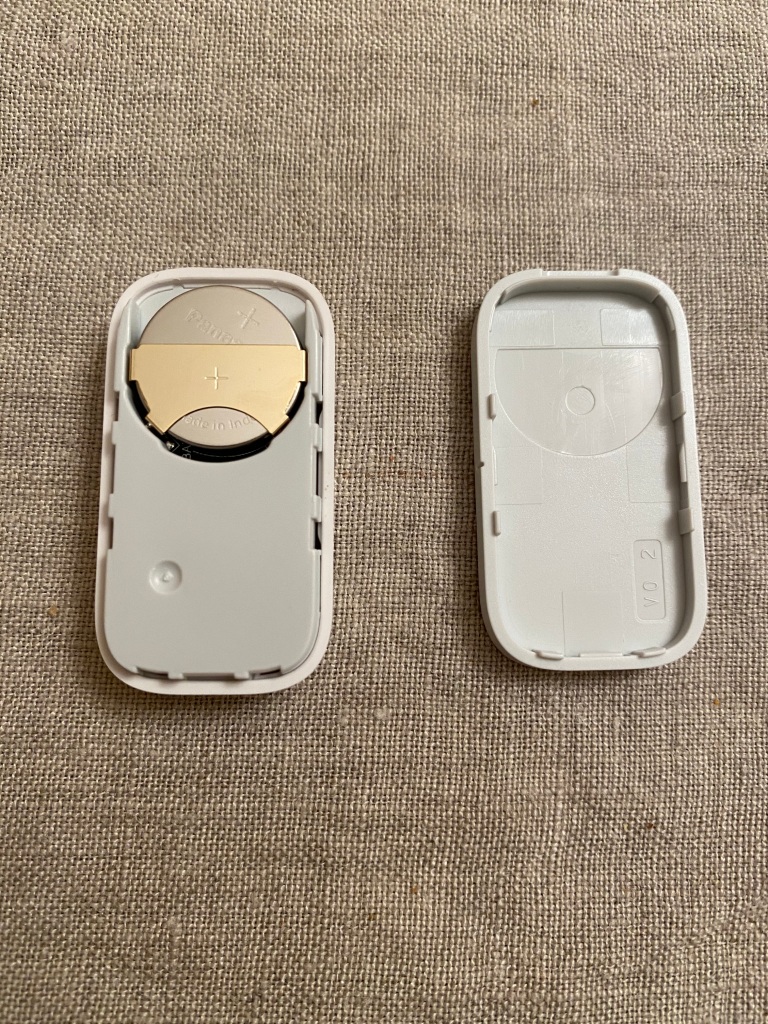
3. Remove the battery and carefully open the gray plastic cover protecting the circuit board.
There are 4 fragile plastic pegs, 2 at the top and 2 at the top. Be careful not to break them when removing the cover.


4. Use wire cutters to snip the glass tube off the circuit board.
The tube is actually a reed switch that closes the circuit when there is a magnet close to it. Remember the second smaller block?

5. Solder wires to the spots where the glass tube used to be.

6. Cut a small opening to the Aqara housing to accommodate for the wires.

7. Use a new or existing wall switch without any other wiring connected to it.
Never connect the newly assembled sensor to a switch with live wires!

8. Connect the wires to the wall switch.
Pay attention which way you connect the wires as it will affect the open-closed state of the switch.
Testing both ways will not harm the sensor or the switch in any way.
That’s it, you are done! Enjoy your new DIY Zigbee wall switch!

Is the Zigbee device still running on battery power?
LikeLike
Yes it is and the battery has lasted close to a year now and still going strong.
LikeLike